In this article, we’ll reveal all you need to know about the Fitbit photograph clock face.
Understanding Your Fitbit
Fitbit devices, ranging from simple fitness trackers to advanced smartwatches, offer various features, including step counting, heart rate monitoring, and sleep tracking.
Before customizing the clock face, it’s crucial to understand which Fitbit model you own, as features may vary. Models like the Fitbit Versa and Sense support photo clock faces, while others may not.
Identify your model by checking the device settings or the original packaging. Once you know your model, verify its capabilities on the official Fitbit website or in the user manual. This step ensures compatibility with the photograph clock face feature.
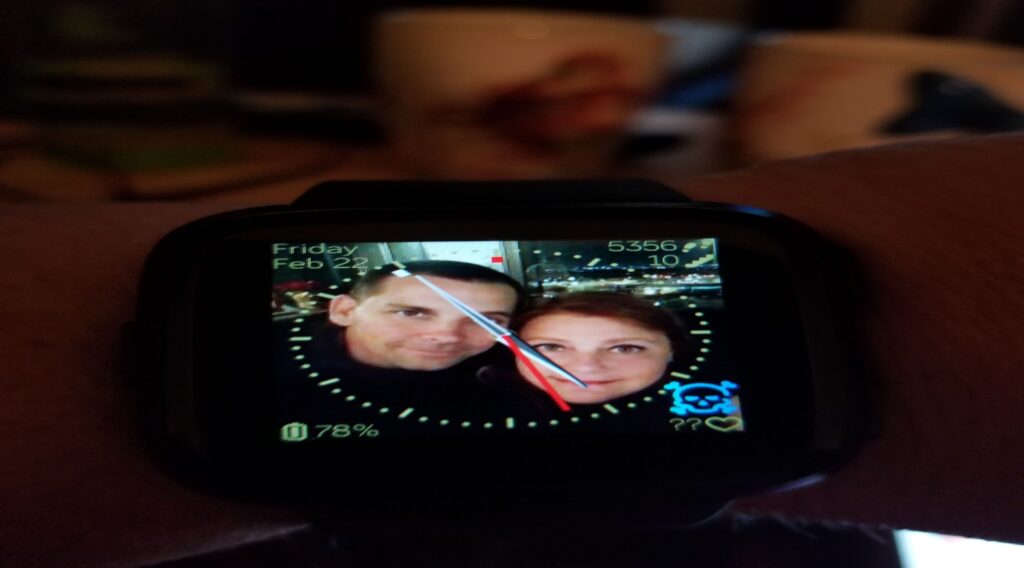
Selecting the Right Photograph
Choosing a photograph for your Fitbit clock face is a personal choice but requires consideration of certain factors for optimal display. High-resolution images work best, ideally with a resolution of at least 300×300 pixels to ensure clarity on the small screen.
Avoid photos with too many details or text, as they can become illegible when scaled down. Consider the shape of your Fitbit screen; square screens may crop circular images, and vice versa.
Test different photos to see how they look when applied. Remember, the photo should not only represent your personal style but also be functional. That is, it must maintain visibility of the time and other critical information displayed on the clock face.
Using the Fitbit App for Customization
The Fitbit app is your gateway to customizing the clock face. Download it from the Apple App Store or Google Play Store. After installation, create an account or log in.
Pair your device by going to the ‘Account’ icon, selecting ‘Set Up a Device,’ and following the on-screen instructions. Once paired, navigate to the ‘Gallery’ section within the app. Here, you will find various clock face options.
Select ‘All Clocks’ and look for clock faces labeled as ‘Customizable’ or ‘My Photos.’ These options allow you to upload your own photograph for the clock face.
Applying the Photograph as Your Clock Face
Once you’ve selected a customizable clock face in the app, tap ‘Select Photo’ to upload your image. You can choose a photo from your phone’s gallery or take a new one.
After uploading, adjust the photo’s position and scale to fit the clock face area. Some clock faces also allow you to customize text color and location, enhancing readability. When satisfied, tap ‘Save’ or ‘Apply.’ Your phone will sync the new clock face with your Fitbit.
Ensure your Fitbit is charged and within Bluetooth range of your phone during this process. The sync may take a few minutes, and your Fitbit will display the new clock face once completed.
Troubleshooting Common Fitbit Photograph Clock Face Issues
If you encounter issues during customization, such as the photo not uploading or the clock face not updating, start by ensuring your Fitbit is charged and within range of your phone. Confirm both devices have a stable Bluetooth connection.
If the problem persists, check if your Fitbit and the Fitbit app are updated to the latest version, as outdated software can cause syncing issues. Restarting both your Fitbit and smartphone can resolve temporary glitches.
Check out this AT&T Motorola Moto G Stylus 2023 smartphone available at Walmart.
For persistent problems or specific error messages, refer to the Fitbit Support page for tailored solutions or contact customer service for further assistance.
